Sample Event - Multi-Day Conference
We have created a simple, yet effective Multi-Day Conference to show you how easy it can be to create your own event.
- The first step in creating your multi-day conference, is to setup the Event Details.
- Once you have completed setting up your event description, time, location and demographic information, setup up an optional Waiver.
- Once this is completed, proceed to setup your Payment Options and Confirmation Messages.
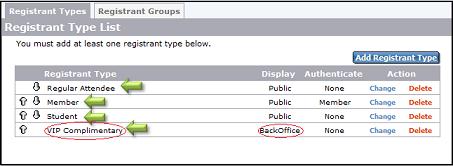
- Once you have completed the above steps, proceed to the Registrants tab. In this section, you will enter your Registrant Types. In our example, we have created the following four types: Regular Attendee, Member, Student and VIP Complimentary. The first 3 will be visible to the public. We have chosen to keep the VIP Complimentary registration 'Hidden' in the GiftTool BackOffice. This is done in order to facilitate the registration of certain guests or speakers who may be receiving a complimentary admission to your event. These guests would need to be registered through Manual Registration.
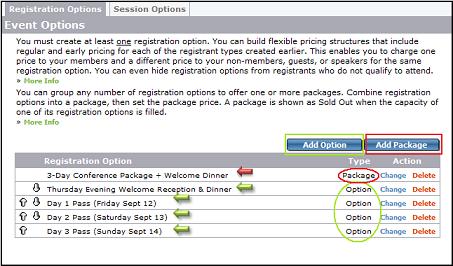
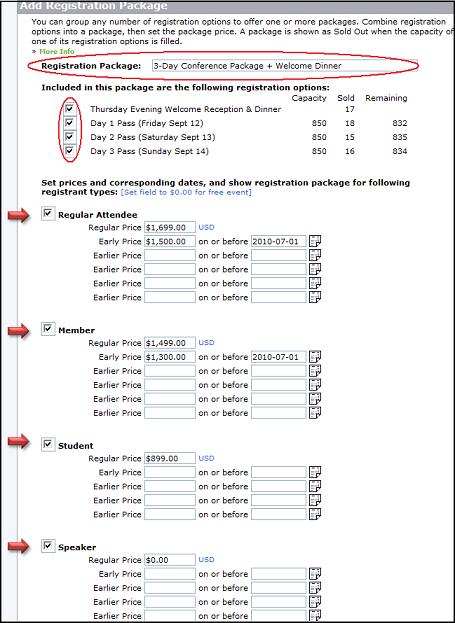
- Next you will need to create your Registrant Options. These are the options your registrants have to choose from, when registering for your Conference. In our example, we have chosen to go with four options and one Package. The Package feature allows you to bundle several options into one package and offer it at a discounted price. We have created the following options: Thursday Evening Welcome Reception & Dinner, Day 1 Pass, Day 2 Pass, Day 3 Pass. (See below Example 1.1). We have decided to offer a Package deal that includes all four options together and will offer it at different prices to the different Registrant Types. (See below Example 1.2)
(Example 1.1)
(Example 1.2)
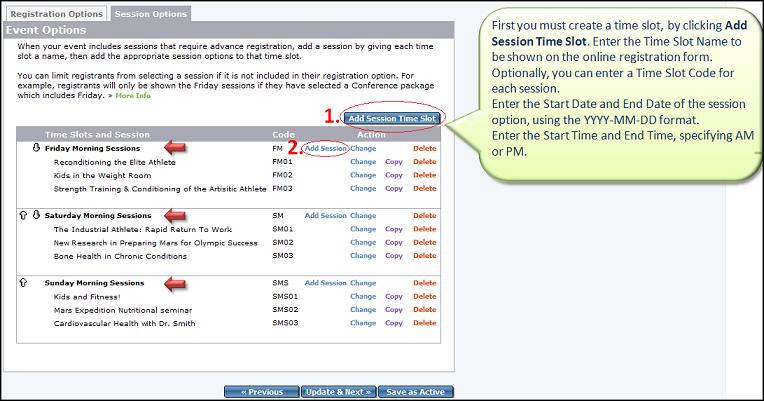
- Now that the Registration Types and Registration Options are setup, you have the option to create Session Options. When your event includes sessions that require advance registration, add a session by giving each time slot a name, then add the appropriate session options to that time slot. In our example, we had earlier created three 1 day conferences. Adding session options allows us to give detail on each conference as well as set a time for when in that day the conference will be held. NOTE: You must first create a Session Time Slot by clicking the "Add Session Time Slot" button, before Adding a session. (See below)
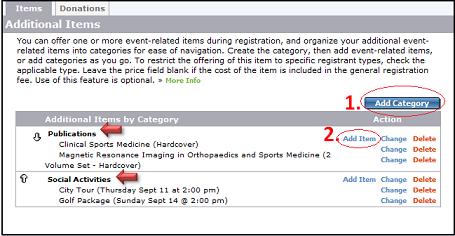
- Using the Additional Items tab you can offer one or more event-related items during registration, and organize your additional event-related items into categories for ease of navigation. Create the category, then add event-related items, or add categories as you go. In our example we did not choose to use additional items, but if you wish to do so, click the link in the above sentence for instructions.
- Optional: If your conference offers Lodging it can be setup using the Lodging tab.
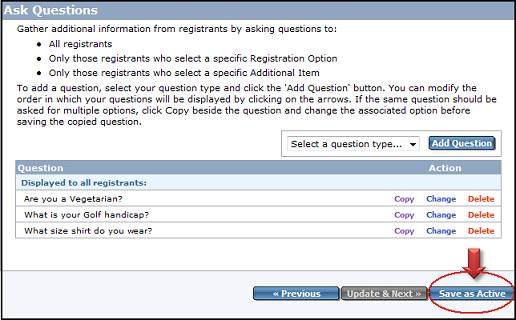
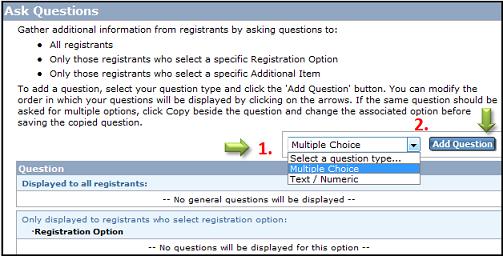
- Using the Ask
Questions section, you can ask questions of your registrants.
For example, questions regarding food choice (ie. Vegetarian?
Y/N). You can ask survey style questions, ask questions for
T-shirt sizes or any other subject you would like to collect
information about as part of the registration for your gala or
event.
-
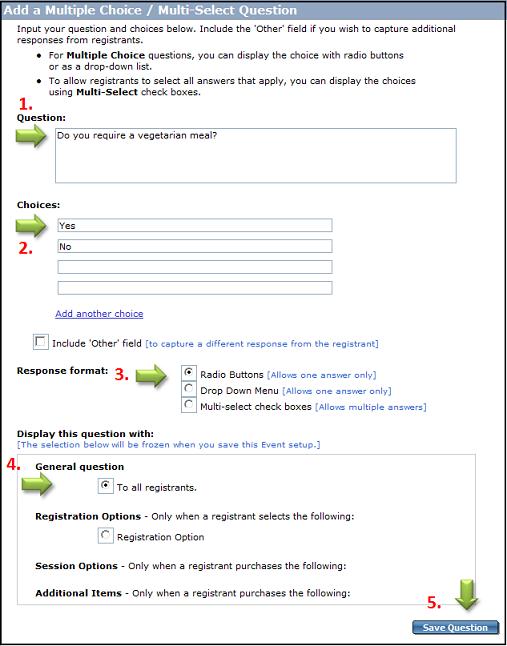
This illustration shows what the
next page looks like. Here you must first enter a Question, then
offer Choices for the answer. After completing the question and
choices, proceed to decide on the Response Format (Radio Buttons,
Drop Down Menu,Multi-Select Check Boxes.) Then you must decide to
show this to either all Registrants or certain Registrant Types.
- Remember to click "Save as Active". You are all done! - Feel free to customize your Multi-Day Conference to your specifications. Good luck with your event!
