
Sample Event - Gala Event
We have created a simple, yet effective registration form for a Gala to show you how easy it can be to create your own event.
Click this link to check out the registration process. Play around with it, just don't enter credit card data on the final page.
Register for the Spring Gala
How to create a registration form:
- The first step is to setup the Event Details.
- After entering your event Description, Date/Time and Location, proceed to the Form Options tab and make sure you select 'Add quantity fields'. This lets your registrants specify the number of tickets they want. If you want to collect the names of the additional attendees you can include a question in the Ask Questions section at a later stage in the event setup (see points 9-11 below).
- Optionally, you can add Waiver that registrants must agree to before proceeding. For example, if your event is a performance that doesn't allow audio or visual recordings, you can include this in your legal waiver that has to be accepted when buying tickets online.
- Once this is completed, proceed to setup your Payment Options and Confirmation Messages.
- If you have eTax Receipting enabled for your account, you can setup your event to automatically issue Canadian eTax Receipts for all or part of the registration, and any optional donations. When setting up your Registration Options, Session Options or Additional Items in steps 7-8-9 below, you can define the amount of the price that is tax receiptable.
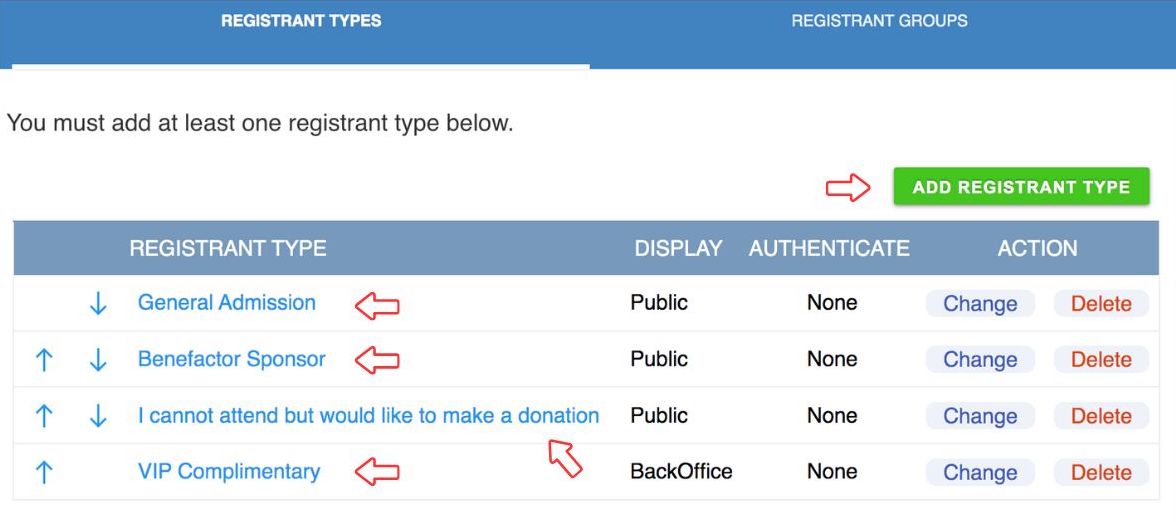
- Once you have completed the above steps, proceed to the Registrants tab. In this section, you will enter your Registrant Types. In our example, we have created the following 4 types: General Admission, Benefactor Sponsor, I cannot attend but would like to make a donation and VIP Complimentary. All but the last type (VIP complimentary), are available to be viewed by the public. We have chosen to keep the VIP registration 'Hidden' in the GiftTool BackOffice. This is done in order to allow your staff to register certain guests or speakers, receiving a complimentary admission to your event, through Manual Registration.
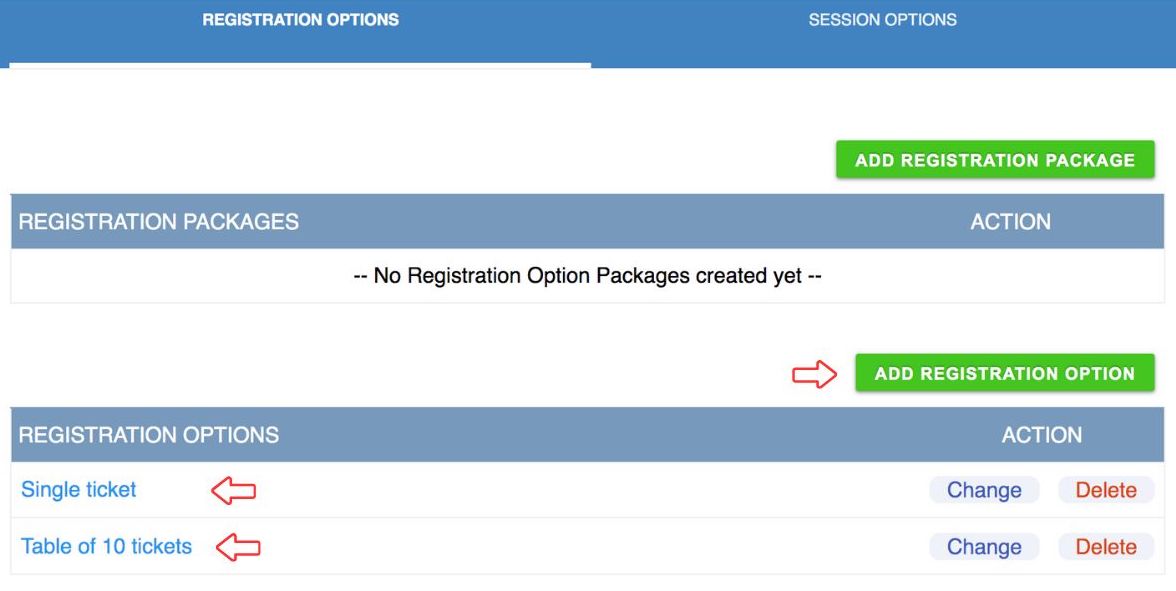
- Next you will need to create your Registrant
Options. These are the options your registrants have to choose
from, when registering for your Gala. In our example, we have chosen
to go with two options: Single Ticket and Table of 10
Tickets. TIP: If you don't associate any
options with "I cannot attend but would like to make a
donation", then anyone who selects that option can skip to the
optional donation section (see more in step # 10 below).
- Optionally add Session Options.
- Using the Additional Items tab you can offer event-related items during registration. Create a category, then add event-related items.
- Add an optional Donation section. You can decide if you want to show it to all or only some registrants.
- Using the Ask Questions section, you can ask questions of your registrants. For example, questions regarding food choice (ie. Vegetarian? Y/N), accessibility needs... Select the type of question (multiple choice or text/numeric), add your question, choices and response format. You can specify if you want to show the question to all or some of your registrants.
- Remember to click "Save as Draft/Active".