
Adding an image using the HTML Editor
NEW easier way to add images to your Donation pages and Event, Pledge-a-thon or Membership descriptions:
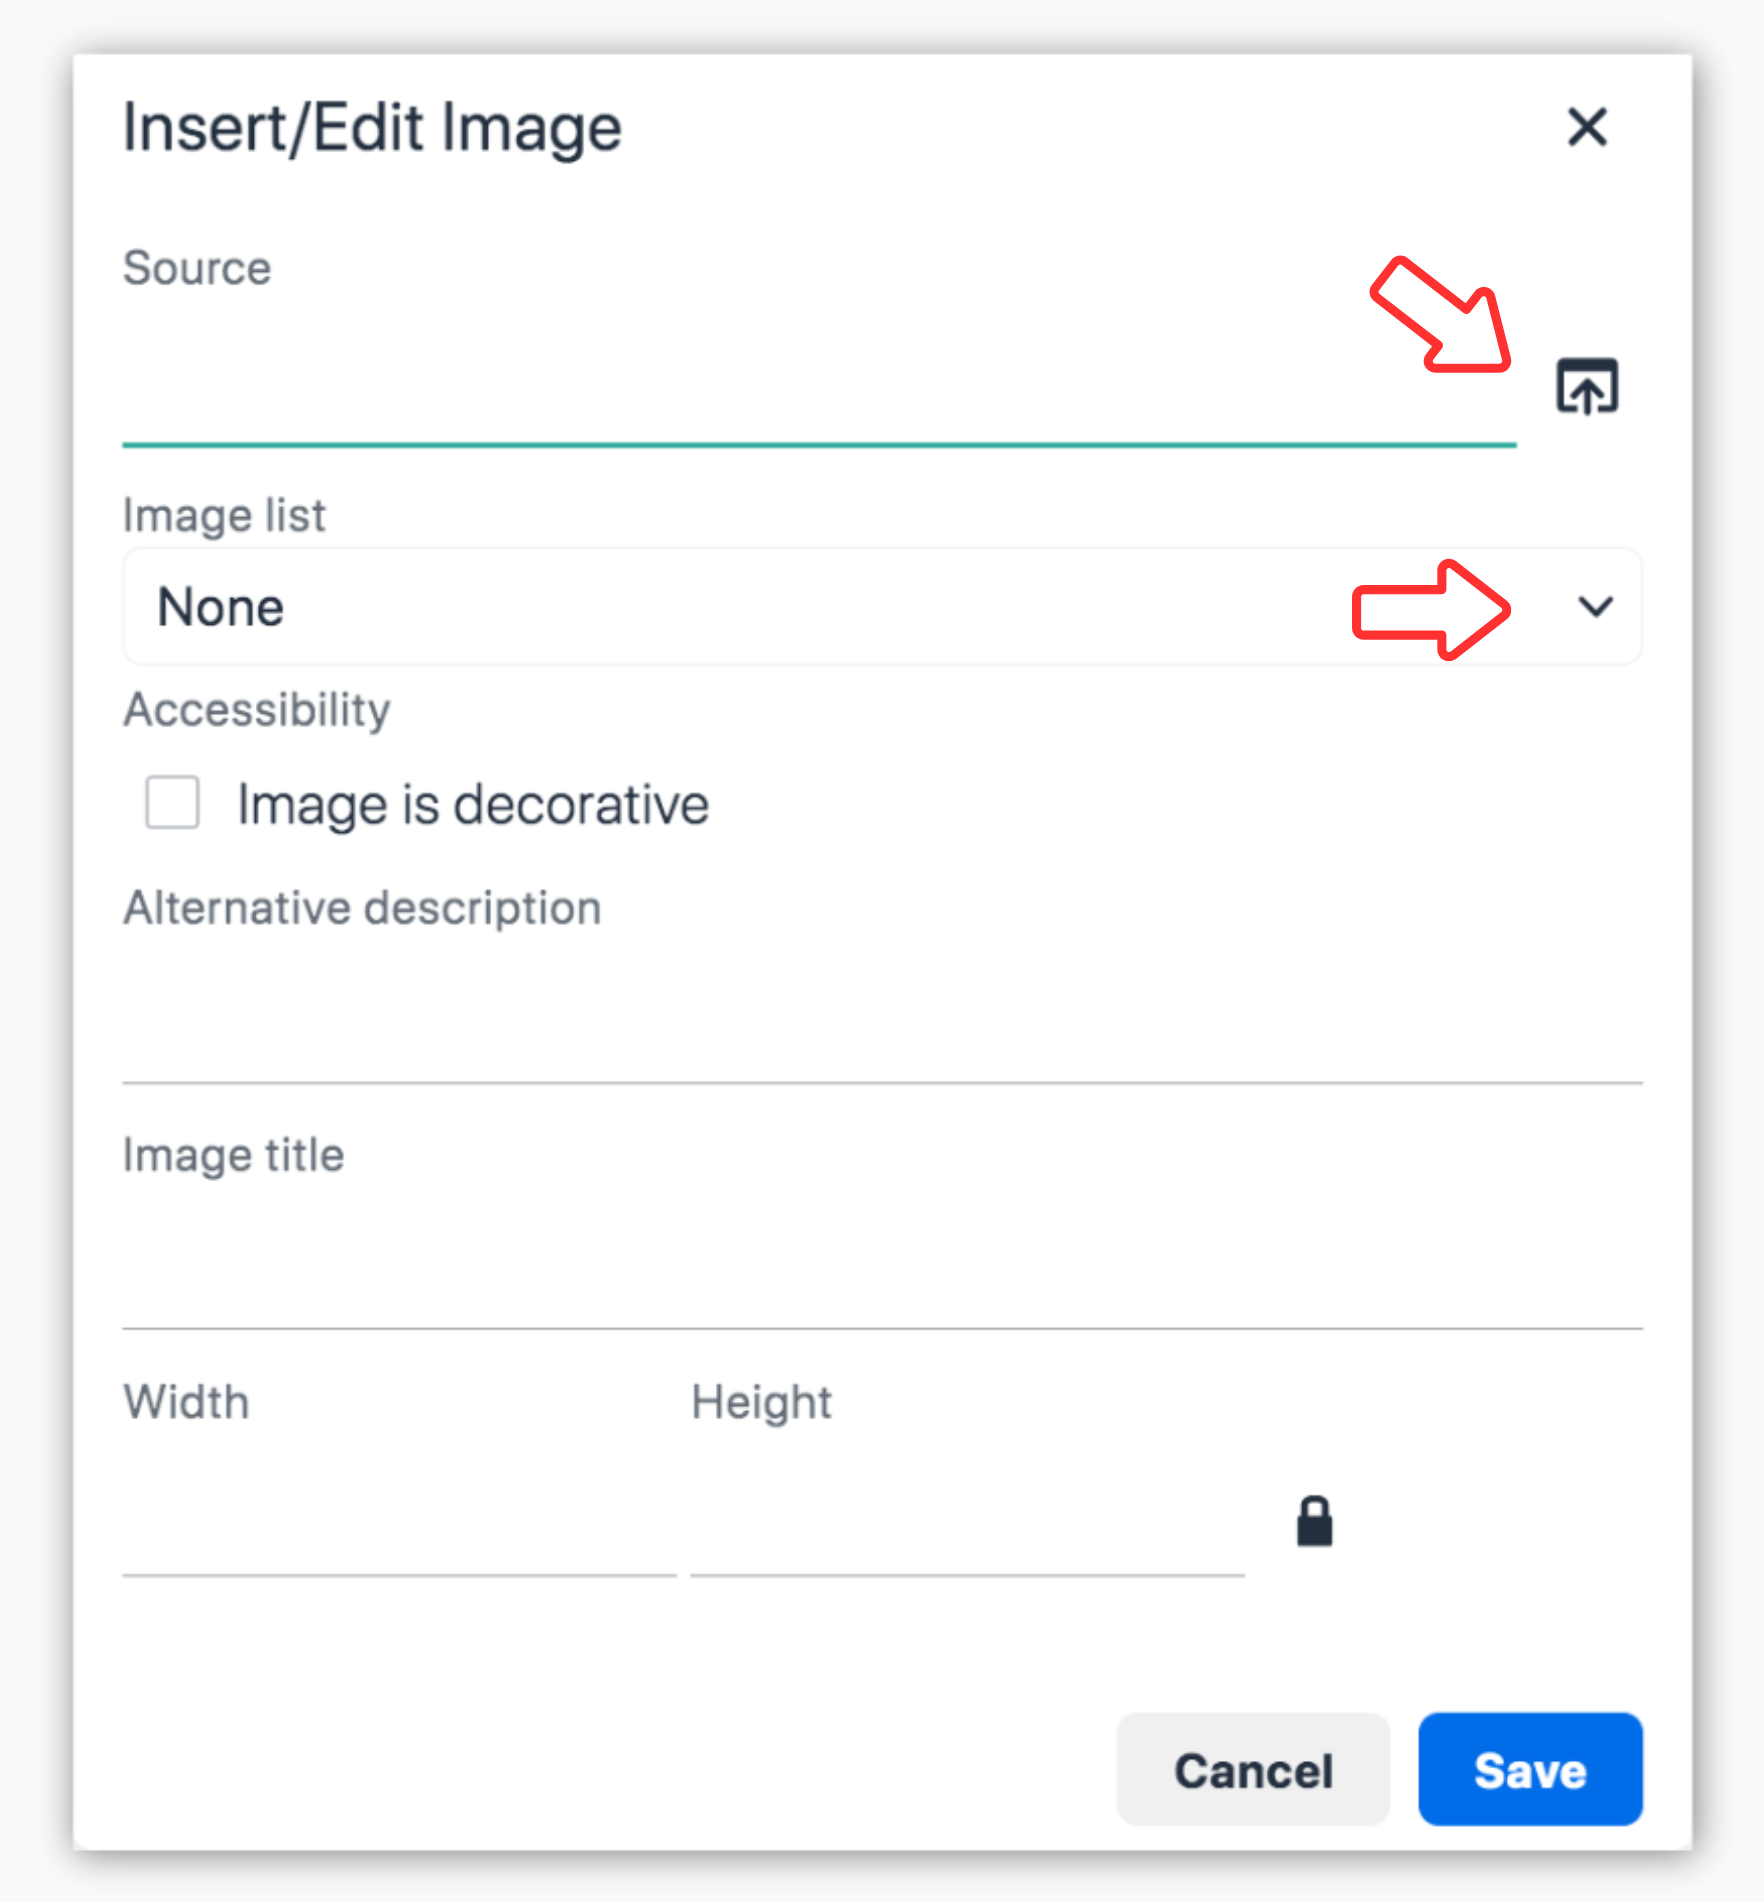
- Position your cursor where you want the image to be displayed and
click the Insert/edit image icon.

- Download the image from your computer, or choose from a list of
images that are already in the Secure Image Hosting
section of your account. When you download a new image it is
automatically added to your Secure Image Hosting
section. Continue with other image details and click Save.
- Resize the image by dragging the corners.
- Click on the image to select left, right or centre alignment.
- TIP: If you are having trouble positioning the image beside your text, you can also create a table and insert the image in one column with your text in the other column. This gives you more control of the positioning across all browsers.
For more control of image styling click the Source code button

Locate the image in the source code. It will look something like this:
<img src="https://gifttool.com/charities/www.YourDomain.com/hosted/ImageName.jpg">
Customize the styling like this example:
<img style="width: 200px; height: auto; max-width: 100%; border: 1.0px solid rgb(204,204,204); margin-left: 5px;" src="https://gifttool.com/charities/www.YourDomain.com/hosted/ImageName.jpg">
Control the size of the image
Example: use width: 200px;
height: auto; max-width: 100%; to
set your image to be 200 px wide.
IMPORTANT: Including max-width: 100%; will allow
the image to shrink down nicely for smaller screens.
Control the size and colour
of a border
Example: use border: 1.0px
solid rgb(204,204,204); to a 1 px
border around the image with this RGB colour.
Add space around the image
Example: use margin: 5px;
to add a margin on all sides of
the image.
Example: use margin-left:
5px; to add a margin on the left
side only.
Images must be hosted in the Secure Image Hosting section of your GiftTool account. This new way of adding images automatically adds the image to your Secure Image Hosting section. If you ever need to add an image directly to your Secure Image Hosting section, follow these instructions.