Sample Event - Golf Tournament
We have created a simple, yet effective sample Golf Tournamnet to show you how easy it can be to create your own event.
- From the Setup menu of the Event Registrar service, click Add an Event
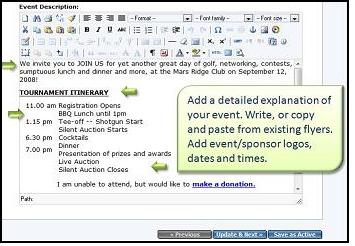
After configuring the event details, enter your tournament itinerary and other details in the event description to be displayed to the public.
- For example, follow the illustration below to help guide you in entering your event details.
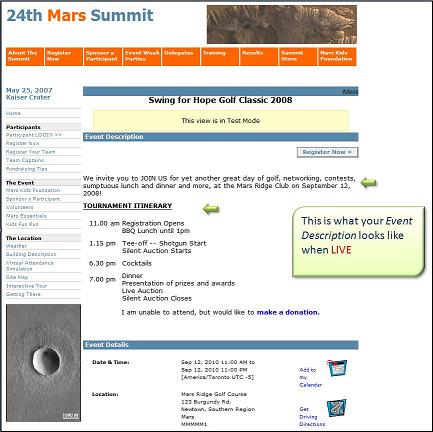
- The illustration below shows what your Event will look like LIVE with the above information entered in your event description.
- After entering your tournament's Date/Time and Location, proceed to the Form Options tab and make sure you select 'Add quantity fields'. Proceed to enter your Registrant Information, Waivers (if applicable), Payment Options and Confirmation Messages.
- NEW - You can setup your event to automatically issue receipts for a portion of the ticket price, along with any optional donations. This is a two step process: first enable tax receipting; then when setting up your Registration Options, Session Options or Additional Items define the amount of the price that is tax receiptable.
- In our example, we have chosen to create only ONE Registrant Type called: 'Golfers & Sponsors' (as seen below). This is a great way to allow both golfers & sponsors the ability to purchase both golf packages and sponsorship packages in a single transaction. If you would like your event to look like this, simply:
- Select the blue Registrants Tab and click Add Registrant Type to create the Registrant Type called 'Golfers & Sponsors'. Once you click Save Registrant Type, your result should look like this:
- Next, setup the Registration Options available for purchase by this Registrant Type.
- To do this, click the blue Event Options tab.
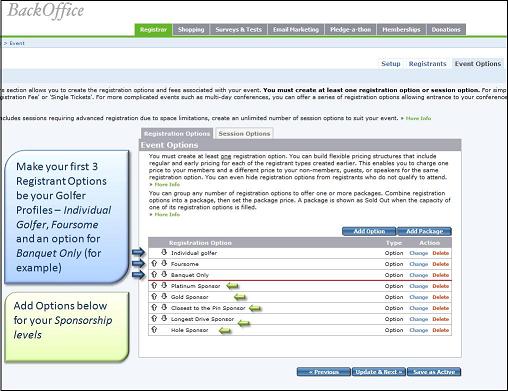
- Click Add Option to first enter your Golfer options for example: Individual Golfer, Foursome and Banquet Only.
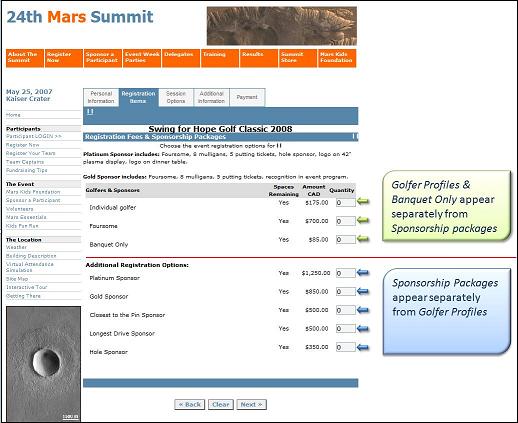
- We have chosen to display the Golfer options, separate from the Sponsorship options, which is displayed further down the page. The reason for this is further explained in the next steps. Use the illustration below as a guide to achieving this format.
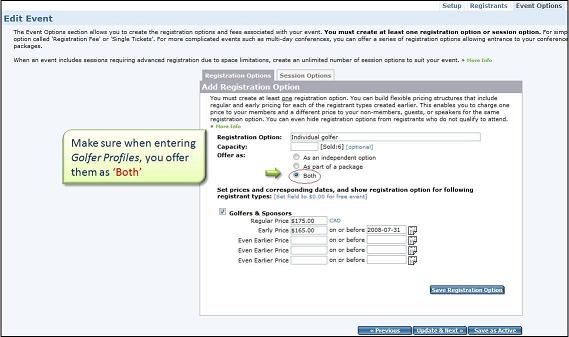
- When entering the Golfer options, we made sure to click the 'Offer as: BOTH' radio button. We repeated this step for all 3 Golfer options. Doing this ensures that your Golfer options show in the first 3 fields when you go Live with your event. The following diagram illustrates this example.
- Next, for our Sponsorship Options, we repeated the same steps as above, but this time, we made sure to click 'Offer as: As an independant Option' radio button. We did this to ensure that our Sponsorship Options show below our Golfer Options creating a streamlined, efficient method for registration. The diagram below illustrates this example.
- This is what your registrants will see once they enter their demographic information and proceed to the selecting Golfer Options section of the registration process. The steps we took in creating the event now show up as illustrated in this LIVE screenshot of our event.
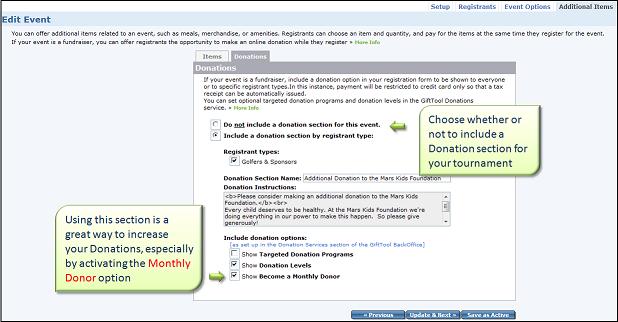
- We have included a page for the registrants to make an optional Donation to our cause. We have also included the 'Monthly Donor' section, to attract more long term donations. To do this, simply:
- Click the blue Additional Items Tab and select the grey Donations section. Use the diagram below as a guide to help you create the same affect in your event.
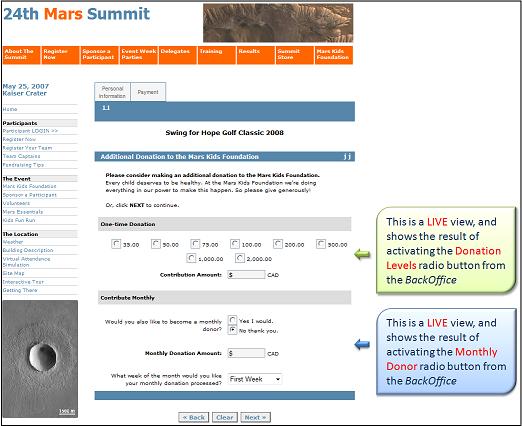
- The following illustration shows the LIVE view of your event once the Donation Levels and Become a Monthly Donor levels are activated in the BackOffice.
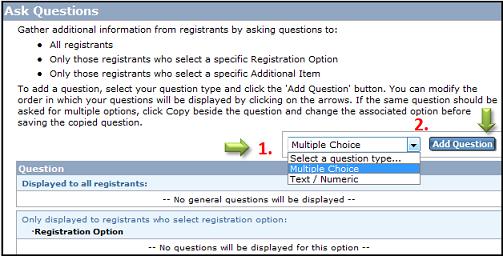
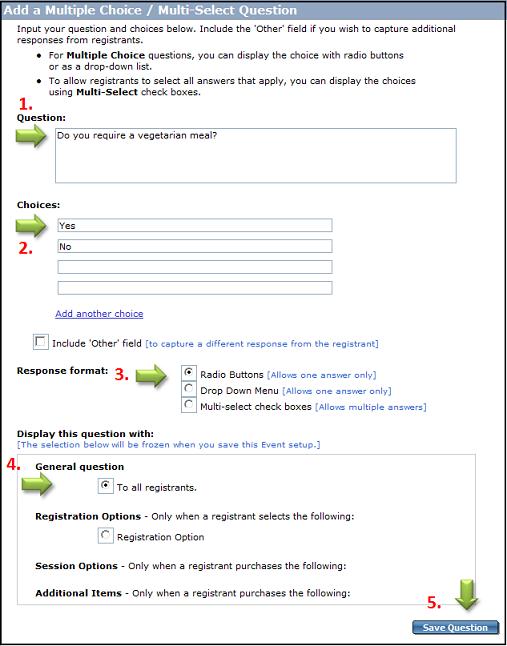
- Using the Ask Questions section, you can ask questions of your registrants. For example, questions regarding food choice (ie. Vegetarian? Y/N). You can ask survey style questions, ask questions for T-shirt sizes or any other subject you would like to collect information about as part of the registration for your gala or event.
- This illustration shows what the next page looks like. Here you must first enter a Question, then offer Choices for the answer. After completing the question and choices, proceed to decide on the Response Format (Radio Buttons, Drop Down Menu,Multi-Select Check Boxes.) Then you must decide to show this to either all Registrants or certain Registrant Types.
Was this information helpful?
|
|